Bisque & Decoration
Bisque
- Any advice given in this document is for ceramic earthenware bisque fired to circa 1060ºc. Earthenware is porous and typically white after firing.
- All items glazed must have guaranteed compatibility with all makes of underglazes and glazes. The Earthenware bisque sold at Country Love Crafts is guaranteed to work with the leading brands of cone 06 underglazes and glazes sold for the Paint Your Own Pottery market.
- Earthenware is porous and typically white firing. Stoneware is semi or vitreous and darker firing). Both products have different firing programs so always ask your supplier for a recommended firing program.
Pre-Decoration
-
Before decorating any bisque items ensure the piece is dust-free and clean. Dust and dirt will prevent any glazes and underglazes from adhering to the items. Dust is particularly common in spouts and bases of teapots/vases etc so please ensure these items are washed thoroughly before decoration. Remember, bisque can be cleaned using fine sandpaper if required but usually a damp sponge is fine.
- Ensure all decorators have washed their hands and decorating areas free from food, grease, hand-creams, salt etc as these products will also prevent any glazes and underglazes from adhering to the finished items.
- Ensure all brushes used for decorating the items are new or have only been used to decorate with underglazes/glazes (i.e. if you also stock non-fire paints, please keep brushes separate to avoid contamination). Also, ensure the brushes are kept clean at all times.
- Instruct any decorators not to apply too many coats of colour/underglaze, as this will prevent the glaze from adhering. Country Love Crafts recommend no more than three coats of thinly applied colour with a brush laden with water and/or glaze conditioner.
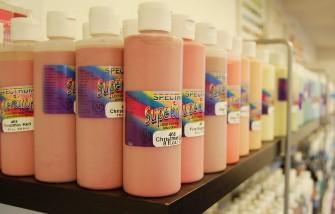
- If your operation de-cants glaze or underglaze from large bottles into smaller ones, remember to thoroughly mix/shake the contents of the bottles before de-canting. Failure to do this will result in an uneven distribution of necessary and important content. Also, remember not to overfill the bottle i.e. leave an inch clear at the top to allow for a good shake.
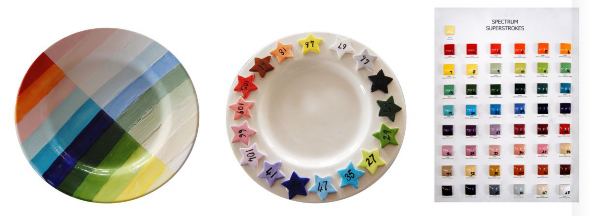
- As the fired colours look very different from the unfired colours, it is best to produce a “colour wheel” to show the difference or end result.
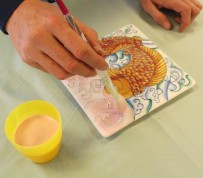
Decoration
- An underglaze colour is finer ground glaze stain and normally contains a frit or flux addition. Typically, stains and underglazes will need a topcoat of clear glaze. This is the most popular product for decorating earthenware bisque.
- Most underglaze colours are translucent. For a more opaque coverage, 3 coats of colour can be applied.
- Coloured glazes can be applied to earthenware bisque but are usually used for block colour coverage ie. they are not used for design work.
- An on-glaze is a fusible colour where all the constituents are melted together and finely ground. On-glaze colours do not need a top coat of clear glaze.
Clear Glazing
Leaded Glazes
- Lead glazes are most commonly used on earthenware, and on older bone china and porcelain. They are reliable, easy to control, durable and they produce attractive glazes as they can enhance the brightness of colours.
- When the glazes are properly formulated and fired at a high temperature, the lead is sealed. However, if they are not properly prepared and fired, lead may leach (i.e. move from the glaze) into food stored in or on the ceramic ware.
- The degree of lead leaching from tableware can vary. It depends on how often the tableware is warmed and used, and the amount of contact it has with food and drink. Cups and bowls are of greater concern than dishes. Acidic foods will accelerate any leaching.
- Both UK and US standards have been established to ensure that levels are kept to a safe minimum in the leaded glazes that are sold on today's market (i.e. in a non-poisonous bisilicate form).
Lead Free Glazes
- Lead free glazes are becoming the standard. This is due to government regulation and personal preference.
- Lead free glazes are made from compositions or materials where lead has not been added.
- To eliminate lead, glazes are reformulated. This can change some of the glaze properties therefore making it less forgiving than the leaded varieties.
Storage
- Ensure glaze is stored in a sealed container to avoid contamination by dust or other glazes.
- Remember all glazes are prone to evaporation and will need water adding to thin the consistency every now and then. Unfortunately, only experience will enable you to add water to the right consistency and this will vary depending on the time of year and where the glaze is stored. For instance, storage in a warm room i.e. next to the kiln will encourage more evaporation than a cold room. Hot summers have the same affect.
- Although no manufacturers labels state “avoid freezing”, in our experience it is best not to store the glaze in an area where it is likely to freeze.
- Do not mix brands of clear glaze on one item as the finished results may differ in colour (even though they are supposedly clear). Also this discolouration can occur between dipping and brushing brands amongst the same manufacturer.
Pre-Glazing and Glaze Preparation
- Ensure all decorated pieces are dry before attempting to clear glaze. In particular, watch out for specialty products e.g. 3D colours that take longer to dry.
- In our experience better glazing results are achieved when both the bisque and glaze are at room temperature.
- Clear glaze is dyed and you will notice different colours for different manufacturers. Please note, this dye disappears during firing and will leave you with a clear, glass-like glaze over your fired item. Dye is applied so that glazers can ensure full coverage of glaze.
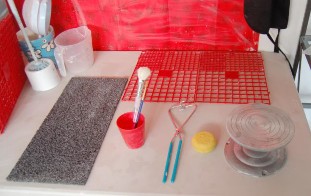
- Before commencing, remember to have nearby any equipment necessary for the type of glazing you will be undertaking e.g. dipping tongs, drying racks, brushes, sponges, glaze, banding wheel and lots of space to dry the items you will be glazing.
- Ensure the glaze, whether it is for use in dipping, spill-glazing or brushing application is thoroughly mixed. Check there is no sediment or layers at the bottom of the glaze containers.
- Remember, some glazes may need stirring in between applications as they can settle rapidly.
- There is no hard and fast rule about the amount of glaze to be applied. Unfortunately, you must be prepared to accept that some bisque is more porous than others and so will need less glaze. Other pieces may take a while to soak up the glaze and so will need a thicker application
- Items decorated with many, or thick, layers of colour will need to be dipped longer so the glaze will penetrate the “barrier” of colour. Don’t forget, these items will also take longer to dry and also, one-stroke colours generally do not cover well.
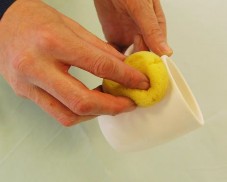
Dip Glazing
- It is worthwhile doing a mental check to see if your biggest item of bisque will fit in the dipping container you will be using and/or there is enough glaze in the container to fully submerge the item. This is because it is best to use a glazing technique that will allow you to cover a surface in one go. If you glaze half of a surface and then turn the item over to glaze the other half it is almost impossible to avoid an overlap and therefore a possible different thickness of glaze. If there is a difference in thickness, this usually shows up after firing. If this is unavoidable, examine the piece carefully after it has dried and “finger rub” down any difference you see visible.
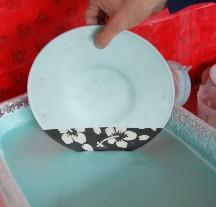
- Tongs are best to use with dipped items as holding an item with your fingers prevents a thumb and forefinger print size section on both sides of the item to miss the glaze. Although, you can easily “dab” over glaze in these missing areas, it may show up as uneven after firing or cause the colour underneath to smear. Dipping tongs leave a pinprick size mark that fills in automatically. However, tongs are difficult to use and you may struggle initially releasing the glazed item onto the drying racks or even scratch the glazed piece during release. Also, please note that occasionally, colour residue may stick to the tongs which if not noticed may re-apply itself to the next item the tongs are used on e.g. if a plate is painted navy blue and you dip it with tongs to glaze the item, a spot of navy colour may stick to the tongs and could potentially appear as two small blue dots on the next item (especially if the next item is white). Therefore, watch out for this, or regularly rinse the tongs before re-use.
- Ensure that the glaze is thoroughly stirred and at the right consistency before attempting to dip an item. In our experience we have found that using a toilet brush to stir the glaze (as opposed to a stick or spoon) breaks up the sediment and ingredients more efficiently. We also swirl round a plastic household sieve after as a final check to detect any lumps etc. DO NOT USE ANY MECHANICAL ITEM TO MIX THE GLAZE as scientific research has shown that this method is too vigorous for the glaze and the glass particles within the glaze are dispersed outwards thereby causing an uneven glaze once fired.
- We recommend a viscosity cup to measure the viscosity of the glaze. Always check the manufacturers recommendations regarding viscosity.
- Grip the item firmly between the prongs of the tongs. It is important that the grip is not only secure but will enable you to manipulate the item in the glaze container. Practice the movements needed in the air before actually dipping the item in the glaze.
- Lower the item slightly tilted into the glaze. Try to keep moving the item gently all time whilst submerging and remember to use a smooth, rapid action to push the item down. This will prevent air being trapped and will encourage a more even coat of application.
- Hold the item submerged long enough to build up the required layer of glaze. The amount of time required varies from glaze manufacturer and also depends on the porosity of the bisque item. On average it is anything from 3-5 seconds. If in doubt pull the item out quickly rather than leaving it in for longer. This is because if you realise after firing that you have not applied enough glaze, you can always apply another coat and re-fire. However, if too much glaze is applied, the item will regrettably be ruined.
- Remove the item from the glaze remembering to continually shake the item to remove any excess glaze. Hold the item over the glaze container until it stops dripping. Allow item to fully dry on racks. Again, as a general rule of thumb, glaze will take up to 5 mins to dry. If it takes longer that this then there maybe a possibility that the glaze is not the right consistency i.e. is too thick.
- If an item “fizzes” or “bubbles” after dipping this may fire out. However, if you are in any doubt, gently “finger-rub” the item to a smooth coating, once the glaze has dried.
- Carefully examine the piece, inside and out, to ensure all surfaces have been fully covered.
Brush Glazing
- Be aware that brush glazing takes a bit of trial and error to produce satisfactory results. This is because of the difficulty in applying an even coat and avoiding brush marks.
- Some brush-on glazes are excellent and need little experience. However, the negatives are that it is labour intensive and an expensive option.
- For best results, use a clean, soft mop brush to apply the clear glaze.
- Fully load the brush and almost “slop” the glaze over the item. Remember to very lightly sweep over the colour, as heavy brushing will cause the decorated piece to smear or the colour to “drag” underneath.
- Apply the first application of glaze in one direction e.g. horizontally and once fully dry, apply the second coat in a different direction e.g. vertically. This will give a final appearance of a more even coat. The number of coats applied varies from manufacturer to manufacturer. Generally speaking, 1 or 2 coats will be sufficient – 3 coats maximum.
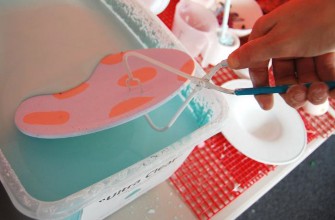
Spill or Roll Glazing
- This technique is best used for items where it is difficult to glaze the inside of a piece in the dip glazing process e.g. teapots or hollowware, or you want a colour glaze e.g. crystal on the outside of your piece.
- Take a small, clean and empty pot and part fill with glaze (either brushing or dipping glaze). Add a small amount of water e.g. usually 33% clean water to 67% glaze, and mix the glaze thoroughly. Either dipping or brushing glaze can be used.
- Empty enough glaze to the inside of your piece so that you can slowly swirl or rotate it round for an even coat all over the inside of the vessel. Empty out any excess glaze. Remember to clean away an excess glaze from the outside or leave a neat line where the spill glazing finishes.
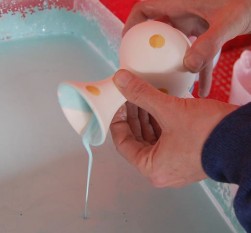
- For Teapots we recommend placing a sponge at the end of a spout during the swirling process and then removing the sponge just before you empty out the excess glaze (which should be done through the spout of the teapot). For Salt and Pepper Pots, we recommend snapping part of a cocktail stick through the holes. This can be left in when firing and will burn away.
- Remember, this should be done quickly and smoothly. Excess glaze should be kept moving and removed quickly to avoid any built-up areas of glaze.
- Keep the diluted glaze completely separate from all other glazes (in an airtight container) and ensure the container is clearly marked Spill or Roll Glaze. Remember to stir or shake well again before re-use.
Bisque Beads - tips for decorating, glazing and firing
- Beads can be placed onto a cocktail stick (or two with the second stick jammed in the end for added stability), a cotton bud or a pipe cleaner for decorating. This is so you don’t need to handle the small beads and risk smudging the paint.
- If you are painting a number of beads, you can stand them up in a ball of soft modeling clay such as plasticine while they dry.
- Offer your customers a small pot of brush-on glaze so they can glaze the beads themselves as part of their painting session. The plasticine ball is useful here too so you can keep all the beads from one customer together.
- You can stick a cocktail stick with a flag into the ball for identification purposes while they dry on your shelf.
- When dry, load your beads onto one of the rods on your bead rack. Make sure your customer has cleaned the inside of each bead so it does not stick to the firing rod.
- Label your bead rack numbers 1- 6 with either an underglaze pencil or using an EZ one-stroke colour.
- Make sure you keep a track of which rod number you have fired each customer’s beads on!
- When your beads are cool enough to come out of the kiln, pop them into a small labeled pot or zip lock bag to keep them together.
- You can include the cost of a length of wax cord with your beads or charge an extra amount. A 1m length will be enough for an adult necklace, two child’s necklaces or a combination of a necklace and bracelet etc. This gives you enough extra for some fancy knotting between the beads or to wrap it double.
- If you want to stock other jewellery accessories, call The Brighton Bead Shop on 01273 740777 or go to www.beadsunlimited.co.uk. Make sure you tell them you got their number from Country Love!
- NB Our bead racks are made from high quality materials and the rods will not bend under the weight of the beads. They are also particularly stable and will not topple in the kiln. You can also use the rack to fire your Christmas decorations!
Glaze Firing
Kilns
- If you do not have a kiln, Country Love Crafts will be pleased to provide all the necessary advice to specify a kiln model and furniture to meet your needs.
- If you require a kiln for ceramic decorating only, do not be persuaded by other suppliers to purchase expensive complicated controllers that are above the specification you need.
- Where possible, and unless you know the history, avoid buying second-hand.
- Bisque from Country Love Crafts and other leading UK bisque suppliers is fired to 1060ºc. The kiln you purchase will need to fire to temperatures up to 1010ºc (with a slow ramp firing for glaze firing). Some UK suppliers provide bisque that requires a lower kiln firing. Avoid mixing bisque with different fire settings, as this will cause endless complications for you and your customers. Also, some underglazes will not mature at the lower temperatures. Others will burn out at the higher temperatures.
- Please call for advice re kiln locations and electrical specification. Most kilns are available in single or three phase specifications.
- Most manufacturers recommend batt washing kiln shelves. However, in our experience we only recommend batt washing the bottom shelf of the kiln. Batt washing is high maintenance as it is required every 6 weeks or so and batt wash will start to chip off and embed itself in your glazed pieces.
- Although we do not recommend batt-washing shelves, speciality glazes (like crystal and pottery glazes) often run. Therefore, either make sure a crystal glazed item is place on a batt washed shelf, or at the very least, stilted on an old piece of unglazed/undecorated bisque just in case the crystal glazes drips more than expected.
- It is recommended that new kilns are fired once before use and following an element replacement and this will form a protective coating on the surface on elements and conditions the brickwork to the firing cycle.
- Typically, thermocouples and elements are not included in the kiln warranty. This is because they are classed as “wear and tear” items. Each manufacturer’s warranty is different so it is wise to check this information prior to ordering. It is important to identify these components prior to use so please ask if you need further information.
- Country Love Crafts have selected to stock kilns with a good support options. Nabertherm UK have a UK based service team and also, Potterycrafts have a national team on the road. Both companies can supply spare parts within short timescales. Please call for assistance.
- Some kilns can smell during the first stages of the firing. This emanates from moisture, the body organics and glaze binders. We strongly recommend that the kiln is used in a well ventilated room / area. The Health Safety Executive provide recommended guidelines which are downloadable from: http://www.hse.gov.uk/pubns/ceis3.pdf
- We recommend that kilns are not opened after firing unless they are lower than 100°C. The kiln controller will display the current temperature inside the kiln so always check the digital display before opening the kiln. Do not use props to hold open the lid. Allow the kiln to cool to below 100c before removing the items.
- If an element becomes misplaced, it can generally be pushed back in and re-pegged.
- Bricks will crack on a kiln. This is inevitable and are referred to as expansion / contraction cracks which reflect the firing process. They do not affect the firing performance and are best left.
- Remember to advise your insurance company that you have a kiln based at home or in your business. If you fail to do this, it is likely that your insurance company will deem your policy uninsured.
- As with all electrical equipment it is advisable to be present during the critical stages of the firing. Some insurance companies insist that a person is present.
Bisque Preparation
- Ensure all bisque items are glazed ready for firing as per the instructions above.
- Every item must be fully dry before attempting to place the piece inside a kiln.
- Remember to “dry foot” or “stilt” every piece of bisque for firing. Failure to do this will result in the item sticking to the kiln shelf during the firing process. Both the bisque item and kiln shelf could become ruined, as the items will have to be chiseled off. Both clear glaze and colour “melts” during firing and hardens during cooling.
- This melting and hardening process during firing ensures that potentially loose cup/mug handles on bisque ware are firmly affixed during firing. You will occasionally have to explain this to customers who believe that handles are not attached firmly enough.
- Also, remember that the melting and hardening process of glaze firing will also cause any items placed too close together or touching the kiln walls and lid to stick to each other.
Dry Footing
- If you turn a piece of bisque upside down, most bisque will have a rim or ridge which protrudes slightly like a small lip.
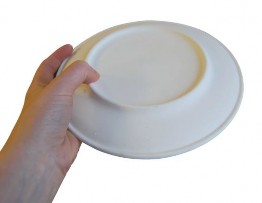
- These ridges need to have any glaze or colour removed from the areas that come into contact with the kiln shelf.
- To remove the dry glaze, gently wipe off with a damp sponge, rubber scrubber, flat knife, fine piece of sandpaper or small piece of damp, hard pile carpet. It does not matter if the removal of glaze appears uneven, as this will not notice too much once fired. Check out your plates and mugs in your kitchen and you will notice most of your pottery will have an unglazed ridge underneath.
- Another way to remove the glaze is to use a “rubber scrubber” to sand/polish your dry foot area (before and after firing) for a professional finish.
- If the underneath is completely flat, or you would like it fully glazed all over the ridges, then you can stilt your piece for firing.
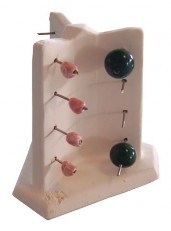
Stilting
- Stilting should not be confused with props. Stilts usually come with metal prongs in various sizes and the glazed piece of bisque should be balanced on top of the metal prongs. Props are use as “shelf raisers” inside a kiln.
- Typically, stilts should be at least a few centimeters smaller in diameter that the base they are balanced on. This is because the item may slip near the edge when firing/melting occurs.
- Typically, stilts will look like this:
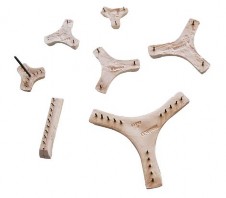
- As well as single point and three point stilts, there are bell stilts and bar stilts.
- The main part of the stilt is made from high-fired ceramic that does not stick to the shelves.
- The metal prongs on the stilts sometimes stick to the glazed items but can be pulled off easily. Be careful not to cut your fingers on the metal prongs of the stilts and on the glazed items once the stilts have been removed.
- Use a stilt/carbarundom stone to grind down any bits of sharp glaze on the bisque item once fired.
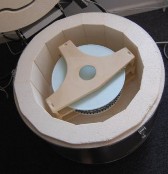
Kiln Loading for Best Results
- The more thought and planning that is put into loading, the better the results. Bisque, shelf placement, the size of the load and the firing characteristics of the kiln are all important factors.
- Kiln shelves come in all shapes and sizes. For economy of space, it is best to choose shelves similar in shape and size to your kiln chamber. For instance, use a round or multi-sided shelf in a round or multi-sided kiln. Keep the size small enough so there is at least 1 “ of space between the shelf edge and the side of the kiln. Also allow some room between the top of your ware and the lid of the kiln.
- Select props (or shelf risers) in heights to accommodate the bisque you are firing. Leave some room between the kiln shelves for air to flow, for heat transfer and for removal of fumes. In our experience, it is always best to load the tallest items at the bottom of the kiln. There are usually less elements at the bottom and it is best to expose as many elements as possible to items on the bottom shelf.
- Half shelves are very useful to improve air movement in the kiln. Use two side by side with a 1/2" space between them and you don’t lose much stacking space. Half shelves also allow more versatility and best usage of the kiln space. Be careful not to “grind” the shelves together as you put them in place. If you do, tiny particles of sand like grit will be found embedded into your glazed pieces.
- Air movement in the kiln is a big consideration - one of the most important factors when loading a kiln. Ceramics need to heat uniformly to prevent warping and stresses in the bisque. Ensure that heat/air can circulate freely around shelves and individual pieces. Arrange your bisque with different sized pieces on the same shelf to allow better heat flow.
- Avoid loading small items in the centre of the kiln shelf and taller items on the outside – this will improve heat flow/circulation e.g. a pyramid loading affect

- Plates and tiles benefit from the use of stilts and stackers. This allows air to move under the large flat objects so they heat more evenly. Avoid heating large flat objects directly on a shelf and remember a slower ramp firing is less like to cause bisque to crack.
- Do not overfill the kiln. One of the most important factors in good firing results is to allow enough air to mature the ware and best develop the colours and glazes.
- Mix thin and thick-walled pieces together throughout the load don’t concentrate them in one area where they are competing for air and heat.
- In summary:
1. Consider heat distribution
2. Don't overfill
3. Stilt or dry foot every piece
4. Increase ramp settings if the firing includes particularly large pieces
5. Stilt any large items
ENSURE THAT THERE ARE NO OBJECTS (LIKE STILTS) PREVENTING THE KILN LID FROM CLOSING PROPERLY.
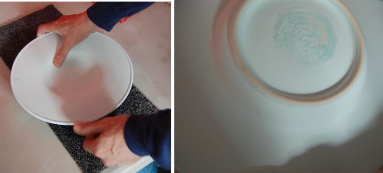
- If you own a kiln with a bung, avoid placing items to be fired too close to the bung, as this is a potential “cool” spot in the kiln. If you have placed an item too close to the bung, you will notice a grey cloud area on the fired piece. If this occurs, just re-fire the item.
Glazing Defects & Anomalies
Crazing
This can appear straight after firing but most commonly occurs weeks/months later. This effect looks like a “crazy paving” i.e. there are many fine cracks that appear on the glazed surface. You will probably hear a pinging sound.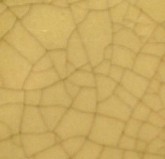
Likely Causes:
- Glaze is too thick or too thin.
- The kiln may have been opened too quickly (if this is the case, you will immediately see the crazing).
- The glaze does not “fit” the bisque or is of low quality.
- The bisque is under fired or damp.
- Thermal shock – extreme temperatures (hot or cold)
- It has been known for items to craze in shop windows too (due to extreme cold and hot temperature spells).
Recommendation:
- Mix glaze according to the manufacturers recommendations. Unfortunately, you will find that experience and “trial and error” will teach you how to obtain the best results. Alternatively, choose a glaze that is guaranteed against delayed crazing.
Milky, Hazy or Matt Glazing
A fired item will appear milky, bluish, and white or lacks gloss.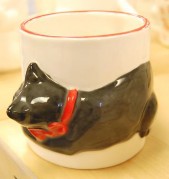
Likely Causes:
- If the glaze is satisfactory on most of the fired pieces, the likely cause is over glazing.
- If the glaze is sticky to touch and appears on most of the fired pieces, the glaze has not matured and it is likely that the kiln is under-firing.
Recommendation:
- To make thick glaze thinner, add small amounts of water regularly to the glaze. Add water a little at a time and use test pieces to ensure the right consistency is achieved.
- Try re-firing the under-fired pieces. If the results are the same, it is likely that the kiln is under-firing. For an under-firing kiln, contact Country Love Crafts for further advice.
- Test dip. You can wash off glaze when testing an uncoloured/decorated item.
Blisters, Craters and Pinholes
These are related glaze surface defects. They show up as a rough, grainy or bubbled surface on the ware and appear after the glaze firing or decorating firing.
Likely Causes:
This family of problems can be caused by many different factors including:
- Glaze not mixed to the right consistency (e.g most likely to be too thick)
- Dust and contamination in the glaze
- Air bubbles in the glaze
- A dirty kiln
- Firing pieces that are still wet or damp
- A kiln that over-fires or under-fires
- A poorly ventilated kiln
- Not enough air in the kiln during firing for the carbon to properly burn out
- The kiln was heated so quickly that there was not enough time for the carbon to burn out. Carbon which is only partially burned will continue to oxidize during the glaze firing causing defects
- Very rarely, you may find that the items were under fired. That is, there was not enough heat during the bisque firing process. When bisque is under fired, it has not shrunk to fit the recommended glaze.
Recommendation:
- An orange peel affect is likely to mean that the glaze is too thick. If this is the case you should see this affect on a number of pieces (unless you accidentally applied too much glaze to one piece)
- Sieve your glaze with a plastic household sieve to detect any dust or particles that are likely to have caused contamination. Alternatively, experiment with a test firing using a new container of glaze,
- Do not use mechanical appliances for mixing glaze as this will cause bubbles. For best results use a toilet brush to stir glaze thoroughly, but not vigorously.
- Clean a potentially dirty kiln – for advice call Country Love Crafts.
- Do not overfill a kiln.
- Check your kiln settings.
- If the kiln settings are correct, use cones to test that the kiln is firing
- Try re-firing the piece
- Ask Country Love Crafts for further advice.
- Vacuum your kiln when dirty or dusty.
Raw Bisque/Item Rough After Firing
A fired item will feel rough to touch in areas.
Likely Causes:
- Glaze is too thin.
- Kiln is over firing and “eating” the glazes.
Recommendation:
- Re-dip and re-fire the items. If this occurs on the odd piece then it is likely that the piece you glazed is less porous than the other pieces in the kiln. If this has happened to the majority of your pieces then you may have added too much water to your glaze. In which case, ensure you dip “FRESH” pieces of decorated bisque for a few more seconds. Check your kiln firing temperatures using temperature cones.
Colour Uneven, Crawling, Running "Pinging" Off or "Shivering"
A fired item will feel rough or uneven to touch in areas – colour may “crawl”. Colour may ping off after firing leaving raw bisque underneath (liked chipped nail varnish). There maybe pinhead bare patches of raw bisque. The colour and glaze may “puddle” and pull away like a little crater during the firing process.
When you fire bisque in the glaze firing, the bisque will basically expand during the firing and contract during the cooling phase. Shivering is typically defined as occurring when the bisque and glaze shrink at different rates. If the bisque shrinks more than the glaze, the glaze has nowhere to go but "shiver" off or "flake" off the bisque. "Shivering" is normally defined as the opposite problem to "crazing" since crazing is often a result of the glaze shrinking more than the bisque. The result is a network of fine cracks in the glaze. Unfortunately, shivering happens with almost all studios over time no matter whose colours or bisque you use. Our goal is to help educate studio owners and managers to the potential causes so the affects of shivering can be limited.
Likely Causes:
- Colour has most likely been “globed” on, usually occurs when children have applied colour.
- Colours or clear glazes are not dry enough before firing. When heated, moisture from the color can turn to steam and cause a poor fit between color and bisque.
- Under-fired or over-fired bisque.
- Contaminated bisque.
Recommendation:
- Educate and supervise – ensure customers use a water-filled brush and/or glaze conditioner to thin colour. Finger-rub raised colour before clear glazing.
- Avoid firing wet pieces.
- Buy bisque from a reputable bisque supplier.
- Ensure decorators do not contaminate bisque with oils, creams grease or food.
Under-developed Purples, Pinks and Reds
Colours will appear faint after firing.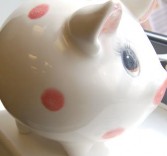
Likely Causes:
- Colour or Glaze has been applied too thickly.
- The kiln has been overloaded preventing oxygenation of the colour.
- Red fired products containing cadmium can experience a washed out or greyed appearance if they are fired too hot, do not have enough colour applied, or are fired with items decorated with copper formula glazes.
Recommendation:
- Allow greater ventilation when firing to allow moisture and gases to escape and provide oxygen to the colour.
- Check soak times. “Soak Time” is the time that the top temperature is held for (e.g. 1020 on most glaze firings). It is usually circa 15mins. The soak time enables each piece to hopefully reach the desired top temperature.
- Avoid excess glaze application (as this prevents oxygenation)
- Control or slow down the firing rate
- As these colours are sensitive, place the items in the centre of the kiln away from the direct heat of kiln elements.
Poorly Dried Pieces
An item will take much longer to dry from colour and glaze application than other pieces.
Likely Causes:
- Colour or Glaze has been applied too thickly. Can cause colour or glaze to crawl and pull up from the bisque.
Recommendation:
- Educate and supervise. Try not to accelerate drying too much (e.g with hairdryers etc). Leave overnight in kiln room to fully dry.
Visible Pencil Marks
Pencil marks show after firing or prevent colour and glaze application.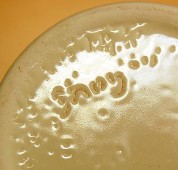
Likely Causes:
- Pencils used are too sharp, too hard (should be soft #2), applied too heavily or the pencil contains waxy compounds.
Recommendation:
- Use soft, non-waxy pencils. Alternatively, ensure pencil marks are removed with an eraser (although this is not always possible). We recommend using cheap felt tips instead as these fire out, not matter what colour.
- Why not test pencils on a piece of broken bisque to see if they fire out and/or do not affect the colour and glaze applications.
Large Plates and Platters Splitting or Cracking During Firing
Item cracks, splits or breaks during glaze firing.
Likely Causes:
- Uneven heating or cooling of the large piece.
- The piece has been stilted instead of dry footed.
- This is likely to be Thermal Shock and is caused by the item being heated or cooled too quickly causing cracks or spilts as a result. To avoid this, make sure your kiln is below 200°c before you attempt to open the kiln and make sure your follow the recommend firing guidelines
Recommendation:
- Raise all large items off the kiln shelf to ensure a more even temperature and place larger items in the centre of the kiln. Slow down ramp firings. If all else fails a ventilation kit will help.
- Dry foot the item and raise it off the kiln shelf using props (to ensure even heat circulation under the item).
- Occasionally, there maybe a fault from the bisque firing process.
Top Tips
Quick Reference Tips
- Do not apply excessive amounts of colour or glaze – educate customer and follow manufacturer’s instructions. Read the bottles for extra information.
- Do not dip item for an excessive amount of time.
- Remember glaze is prone to evaporation and will need thinning according to weather and storage conditions.
- Try to avoid double dipping.
- Shake an item after dipping to avoid runs and drips.
- Finger rub out any lumps, bumps or inconsistencies seen with the naked eye after glazing and before firing.
- Ensure pieces are dried fully before clear glazing and again before firing.
- If smears occur, avoid aggressive brush glazing and heavy colour application. Particularly watch out when pieces have been decorated with speciality 3D products. Also, remember that some 3D speciality products like Bumpy Doodles and French Dimensions are glazed-based colours so can be applied without an application of clear glaze over the top.
- Undeveloped colours are usually due to excessive colour application.
- Educate decorators to wash hands thoroughly.
- Avoid using sharp, hard or heavily applied pencils. Do not buy pencils with a waxy compound as these will act as a wax resist.
- Avoid contamination by ensuring bisque, environment and glaze are clean. Particularly watch out when decanting colour or when customer’s “pour back” colour after use.
- Do not advertise finished pieces as being oven or microwave proof as earthenware products are porous and can absorb water through stilt marks or unglazed areas. Also, repeated heating and cooling can cause glaze to craze or form hairline cracks. Why risk damaging a sentimental piece that has been uniquely painted with loving care.
- Delayed crazing usually occurs weeks or months later by moisture entering the item.
- Immediate crazing will be apparent if the kiln is opened too quickly or excessive amounts of glaze/colour.
- Stilt large plates/platters in the centre of the kiln to avoid cracking during firing and if possible, slow the ramp firing.
- Do not mix glaze too vigorously as this will create air bubbles – we recommend using a toilet brush to mix glaze.
- Often a piece appears different to your expectations after firing. If you want to see if you have added enough colour, or a rough idea on how the finished item will look, spray lightly with a mist bottle and you will get a better idea of the end result!
- Make sure stoppers fit items before decorating and firing. Remember that clear glaze will make the hole slightly smaller after firing.
FAQ
Q. Does glaze go out of date?
A. Always check with the manufacturer. Most glazes last for quite a few years.
Q. What causes glaze to resist in “patches” on a single item?
A. This is likely to be caused by silica build up on the mould itself (sometimes called an hotspot). This happens during the slip casting process. Although pourers should ensure slip is poured into the mould by moving the pouring nozzle about, it is sometimes difficult and the slip “lands” on the same part of the mould causing a silica build up on the clay item. Unfortunately, this is not always noticeable before or after bisque firing. When the hotspot is noticeable, you will see a small light brown watermark.
Q How often do you need to stir glaze?
A. Glaze should be stirred thoroughly before use and according to the manufacturers instructions. Some thinner glazes separate more quickly but this should be apparent to the naked eye and therefore re-mixing should happen as and when this is apparent.
Q. Where should I store glaze?
A. Again, follow the manufacturer’s instructions. However, in our experience avoid storing glaze in a room where it is likely to freeze. We store our glaze next to the kiln as we have found glaze stored at room temperature, and bisque glazed at room temperature ends with more reliable results.
Q. Can I fix a piece for my customer?
A. If the issue is the glaze firing (i.e. it might be under fired or fast fired), you may want to try re-firing. If the problem may have occurred in the bisque firing, try grinding down any of the thick craters with a dremel tool then brush on a thin coat of clear glaze, and re-fire.
Q. Can I fix a piece for my customer?
A. If the issue is the glaze firing (i.e. it might be under fired or fast fired), you may want to try re-firing the item. Small items can be re-fired 2-3 times. Larger items may crack during a 2nd firing.
If the problem may have occurred in the bisque firing, try grinding down any of the thick craters with a Dremel tool then brush on a thin coat of clear glaze, and re-fire.

